TIL: FastAPI, OpenAPI, and Bearer token authentication
Published onThe Python web framework FastAPI generates an OpenAPI
description of your endpoints automatically, making them
available under the /docs path of your site.
For example this application:
from fastapi import FastAPI


app = FastAPI()


@app.get("/", response_model=str)
async def index():
    return "Hello, world!"
results in this documentation:
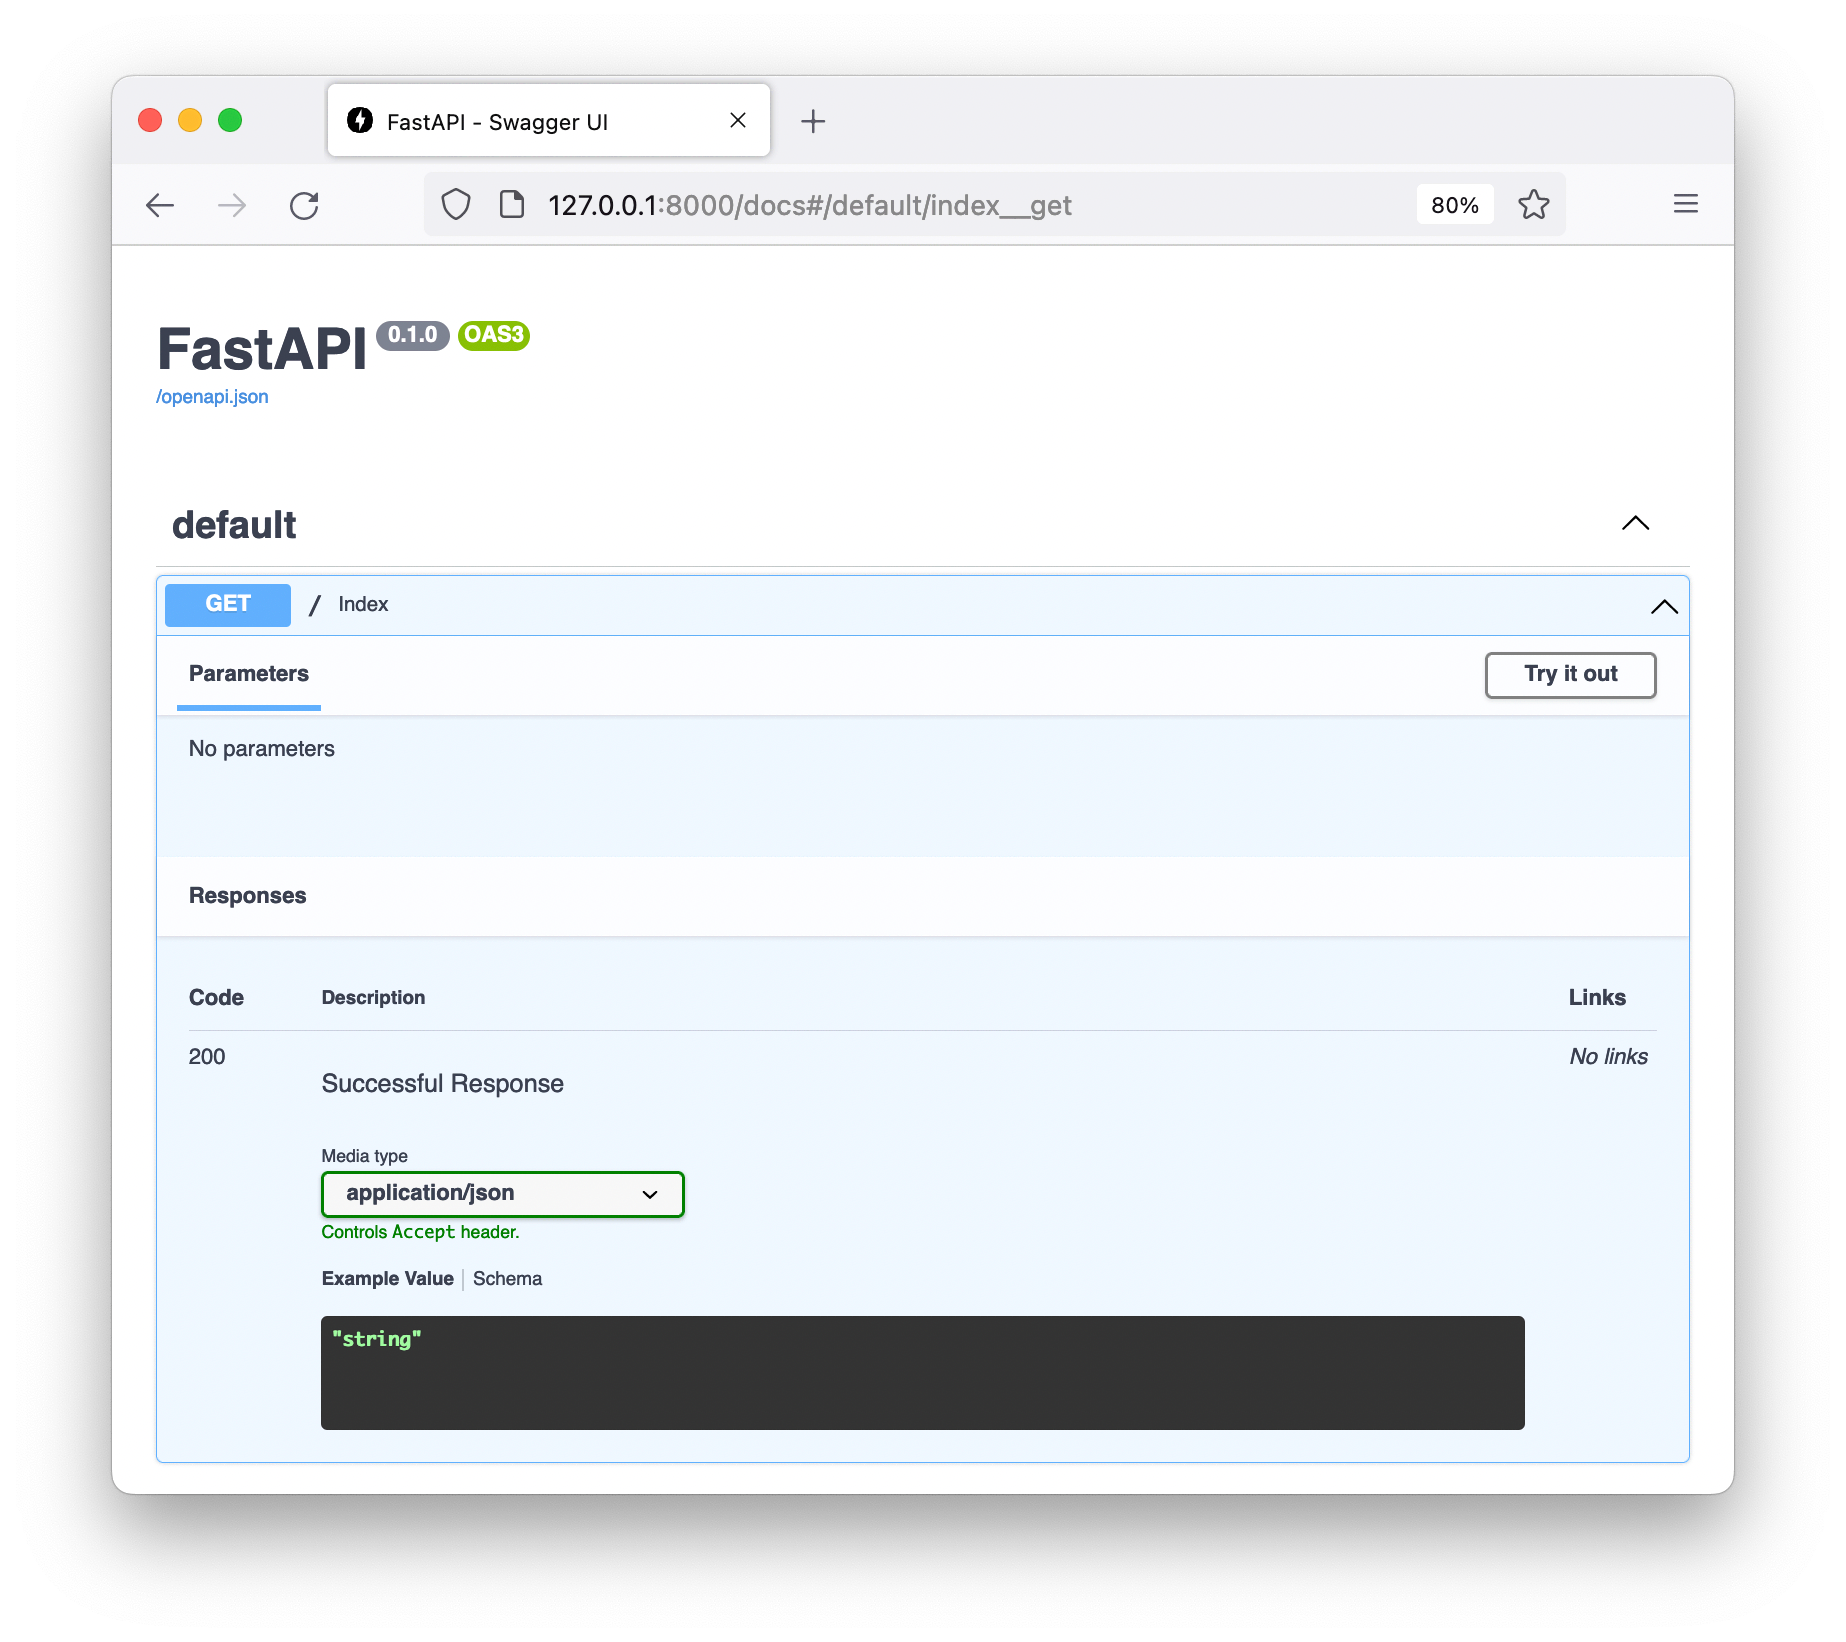
FastAPI uses the information declared on the endpoint function, index in this
case, to generate the OpenAPI specification data including:
- Description (from the function’s docstring).
- HTTP method.
- URL parameters.
- Request and response schemas (converted to JSON from their Python representations).
Including an OpenAPI specification, and presenting the associated Swagger UI shown above, is helpful for several reasons.
- It gives users of your API an idea of what’s available and how to use it.
- It provides a “try it out” button so users can run requests against the API interactively, inserting parameter and request schema values via text fields and seeing the response code and text reported back.
- Developers and third-party tools can use the specification to generate API clients or their own versions of the documentation.
The OpenAPI specification supports describing required authentication for given endpoints, but it’s not obvious how to add support for this in all cases to your FastAPI application such that it appears in the Swagger UI.
Bearer token authentication
I was working on a FastAPI site recently which used Bearer token authentication. This requires an HTTP header containing an API token, which we can then use to look up users in a database and granting or denying access accordingly. It takes the form
Authorization: Bearer api_token_abc123A naive implementation of this might use FastAPI’s Header dependency
support to retrieve the header value.
from fastapi import Depends, Header, HTTPException
from pydantic import BaseModel
from starlette import status


# Placeholder for a database containing valid token values
known_tokens = set(["api_token_abc123"])


class UnauthorizedMessage(BaseModel):
    detail: str = "Bearer token missing or unknown"


async def get_token(
    authorization: str = Header(default="Bearer "),
) -> str:
    _, token = authorization.split(" ")
    # Simulate a database query to find a known token
    if token not in known_tokens:
        raise HTTPException(
            status_code=status.HTTP_401_UNAUTHORIZED,
            detail=UnauthorizedMessage().detail,
        )
    return token


@app.get(
    "/protected",
    response_model=str,
    responses={status.HTTP_401_UNAUTHORIZED: dict(model=UnauthorizedMessage)},
)
async def protected(token: str = Depends(get_token)):
    return f"Hello, user! Your token is {token}."
We can make requests to this protected endpoint using the documentation:
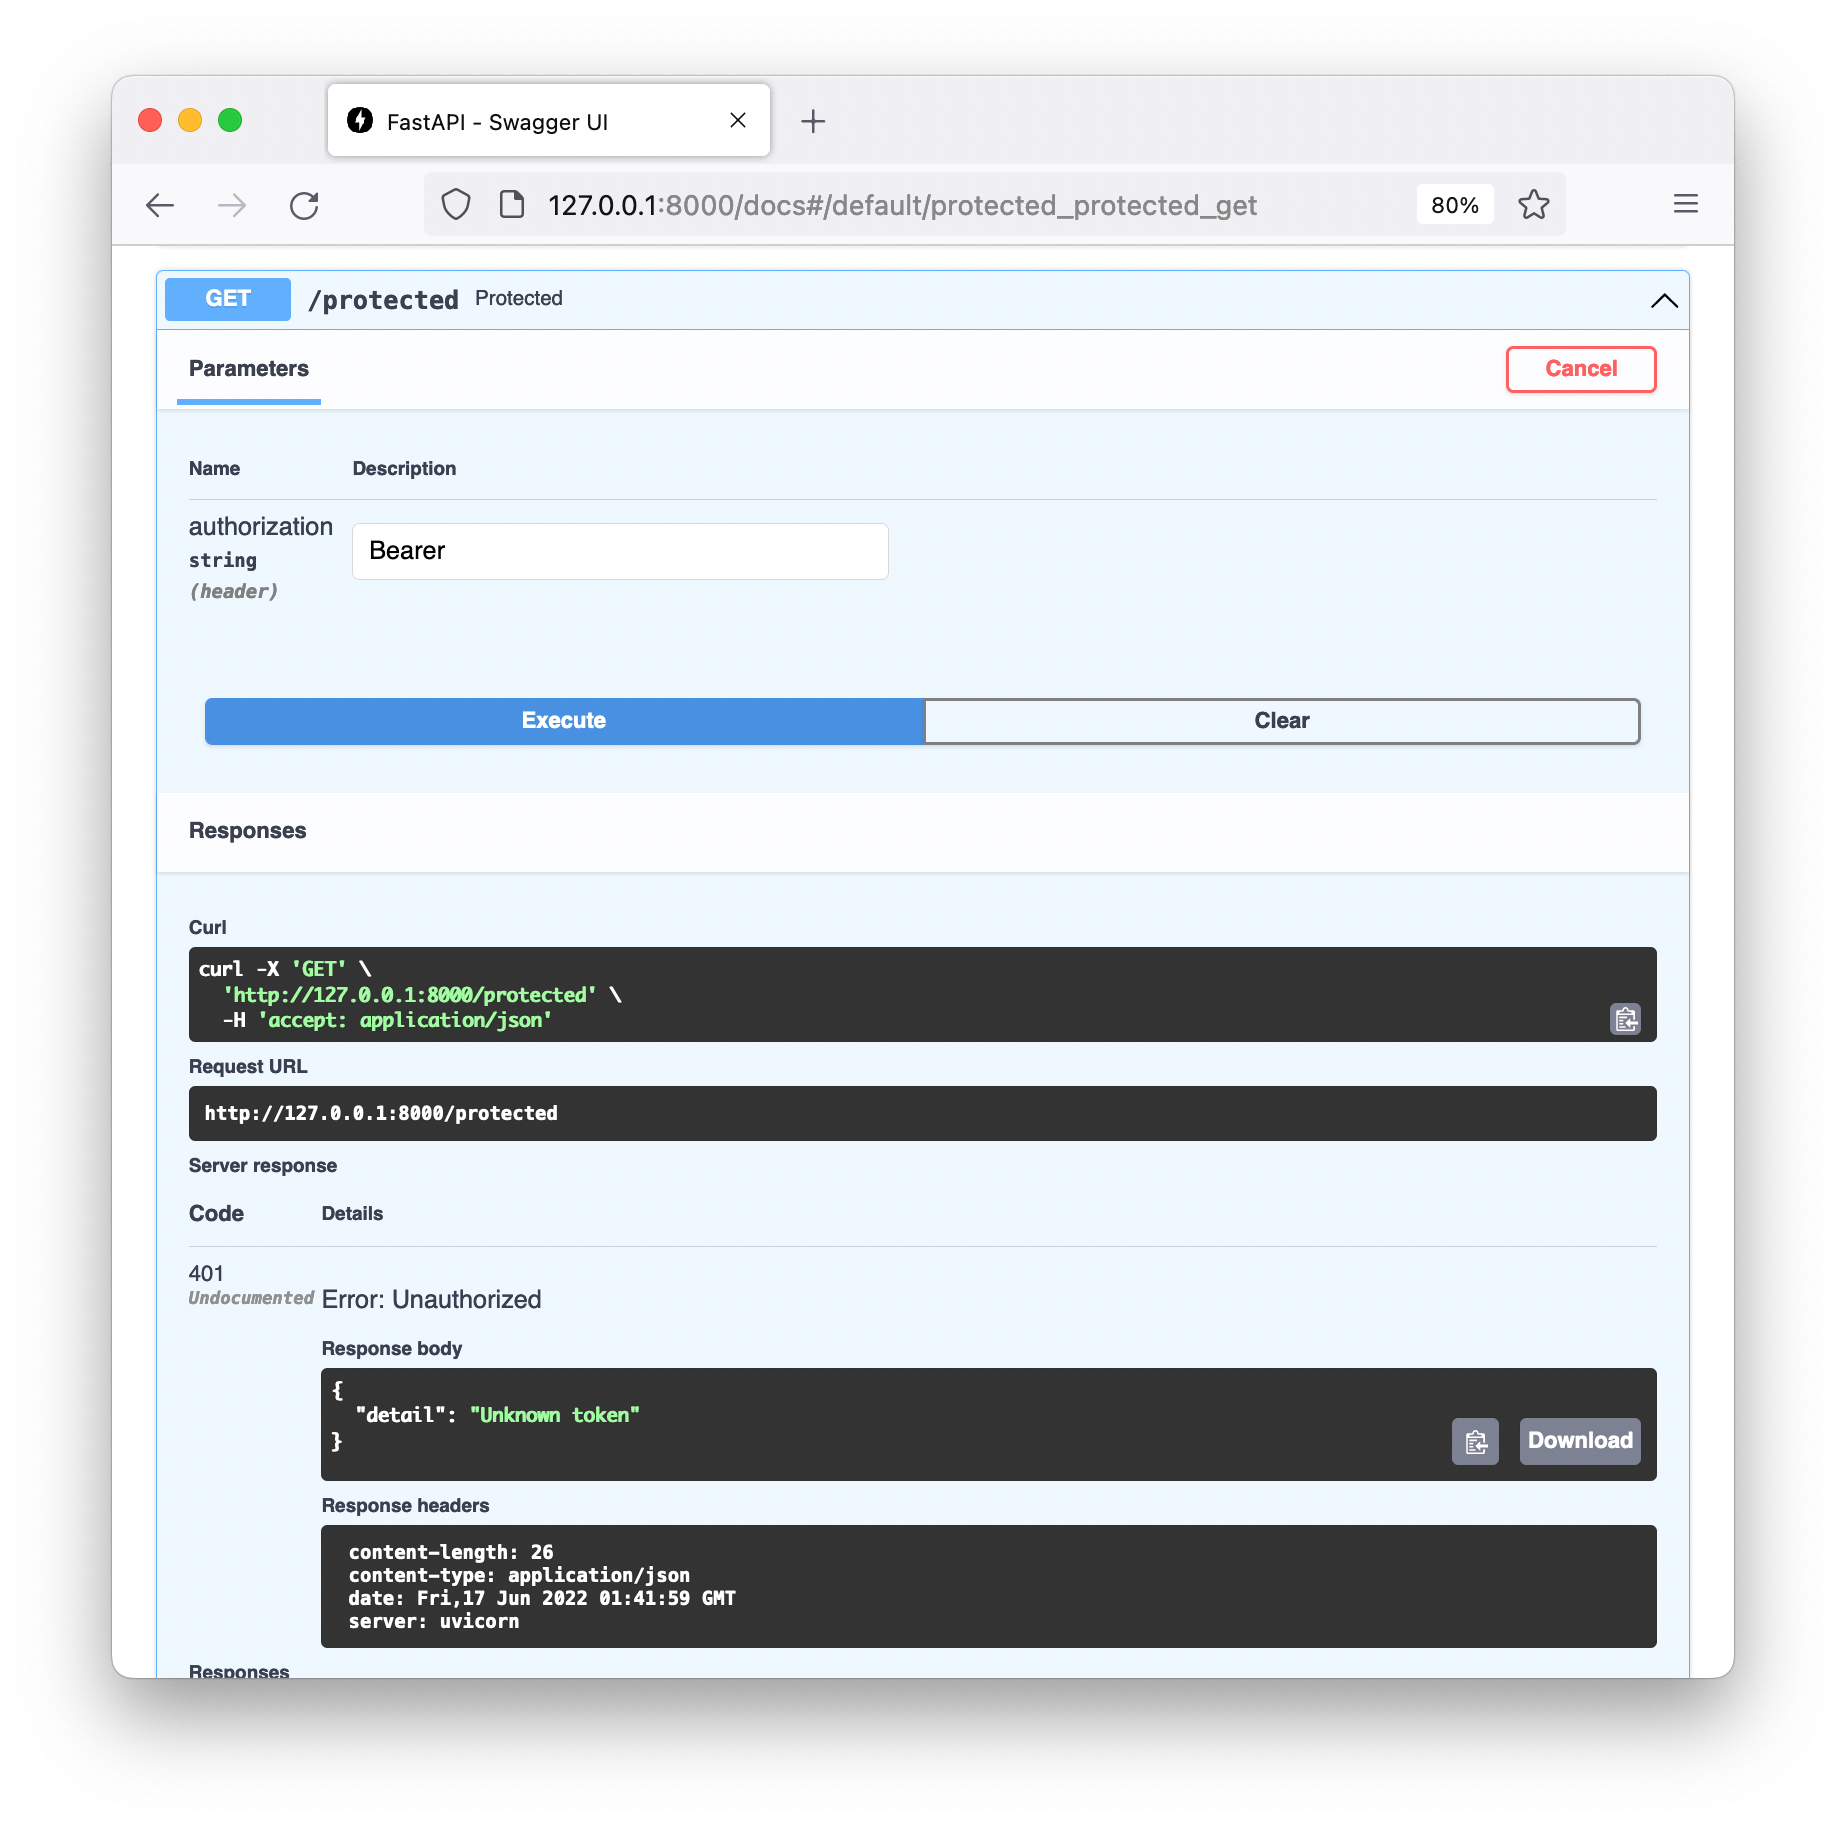
But there are a couple of ugly features:
- The user must take care to ensure the header value starts with
Bearer. - Our application has to parse the
Authorizationheader manually. Indeed we haven’t done a very thorough job in the example, as for example theauthorization.split(" ")call will fail if the header value doesn’t contain a space. - OpenAPI supports authorisation explicitly, but in our documentation it’s obscured behind some header value.
FastAPI supports semantic authorisation but the documentation
doesn’t make it clear how to add simple Bearer token support. Luckily it is
indeed simple enough.
import typing as t

from fastapi.security.http import HTTPAuthorizationCredentials, HTTPBearer


# We will handle a missing token ourselves
get_bearer_token = HTTPBearer(auto_error=False)


async def get_token(
    auth: t.Optional[HTTPAuthorizationCredentials] = Depends(get_bearer_token),
) -> str:
    # Simulate a database query to find a known token
    if auth is None or (token := auth.credentials) not in known_tokens:
        raise HTTPException(
            status_code=status.HTTP_401_UNAUTHORIZED,
            detail=UnauthorizedMessage().detail,
        )
    return token
Now the documentation shows a little lock icon next to our protected endpoint:
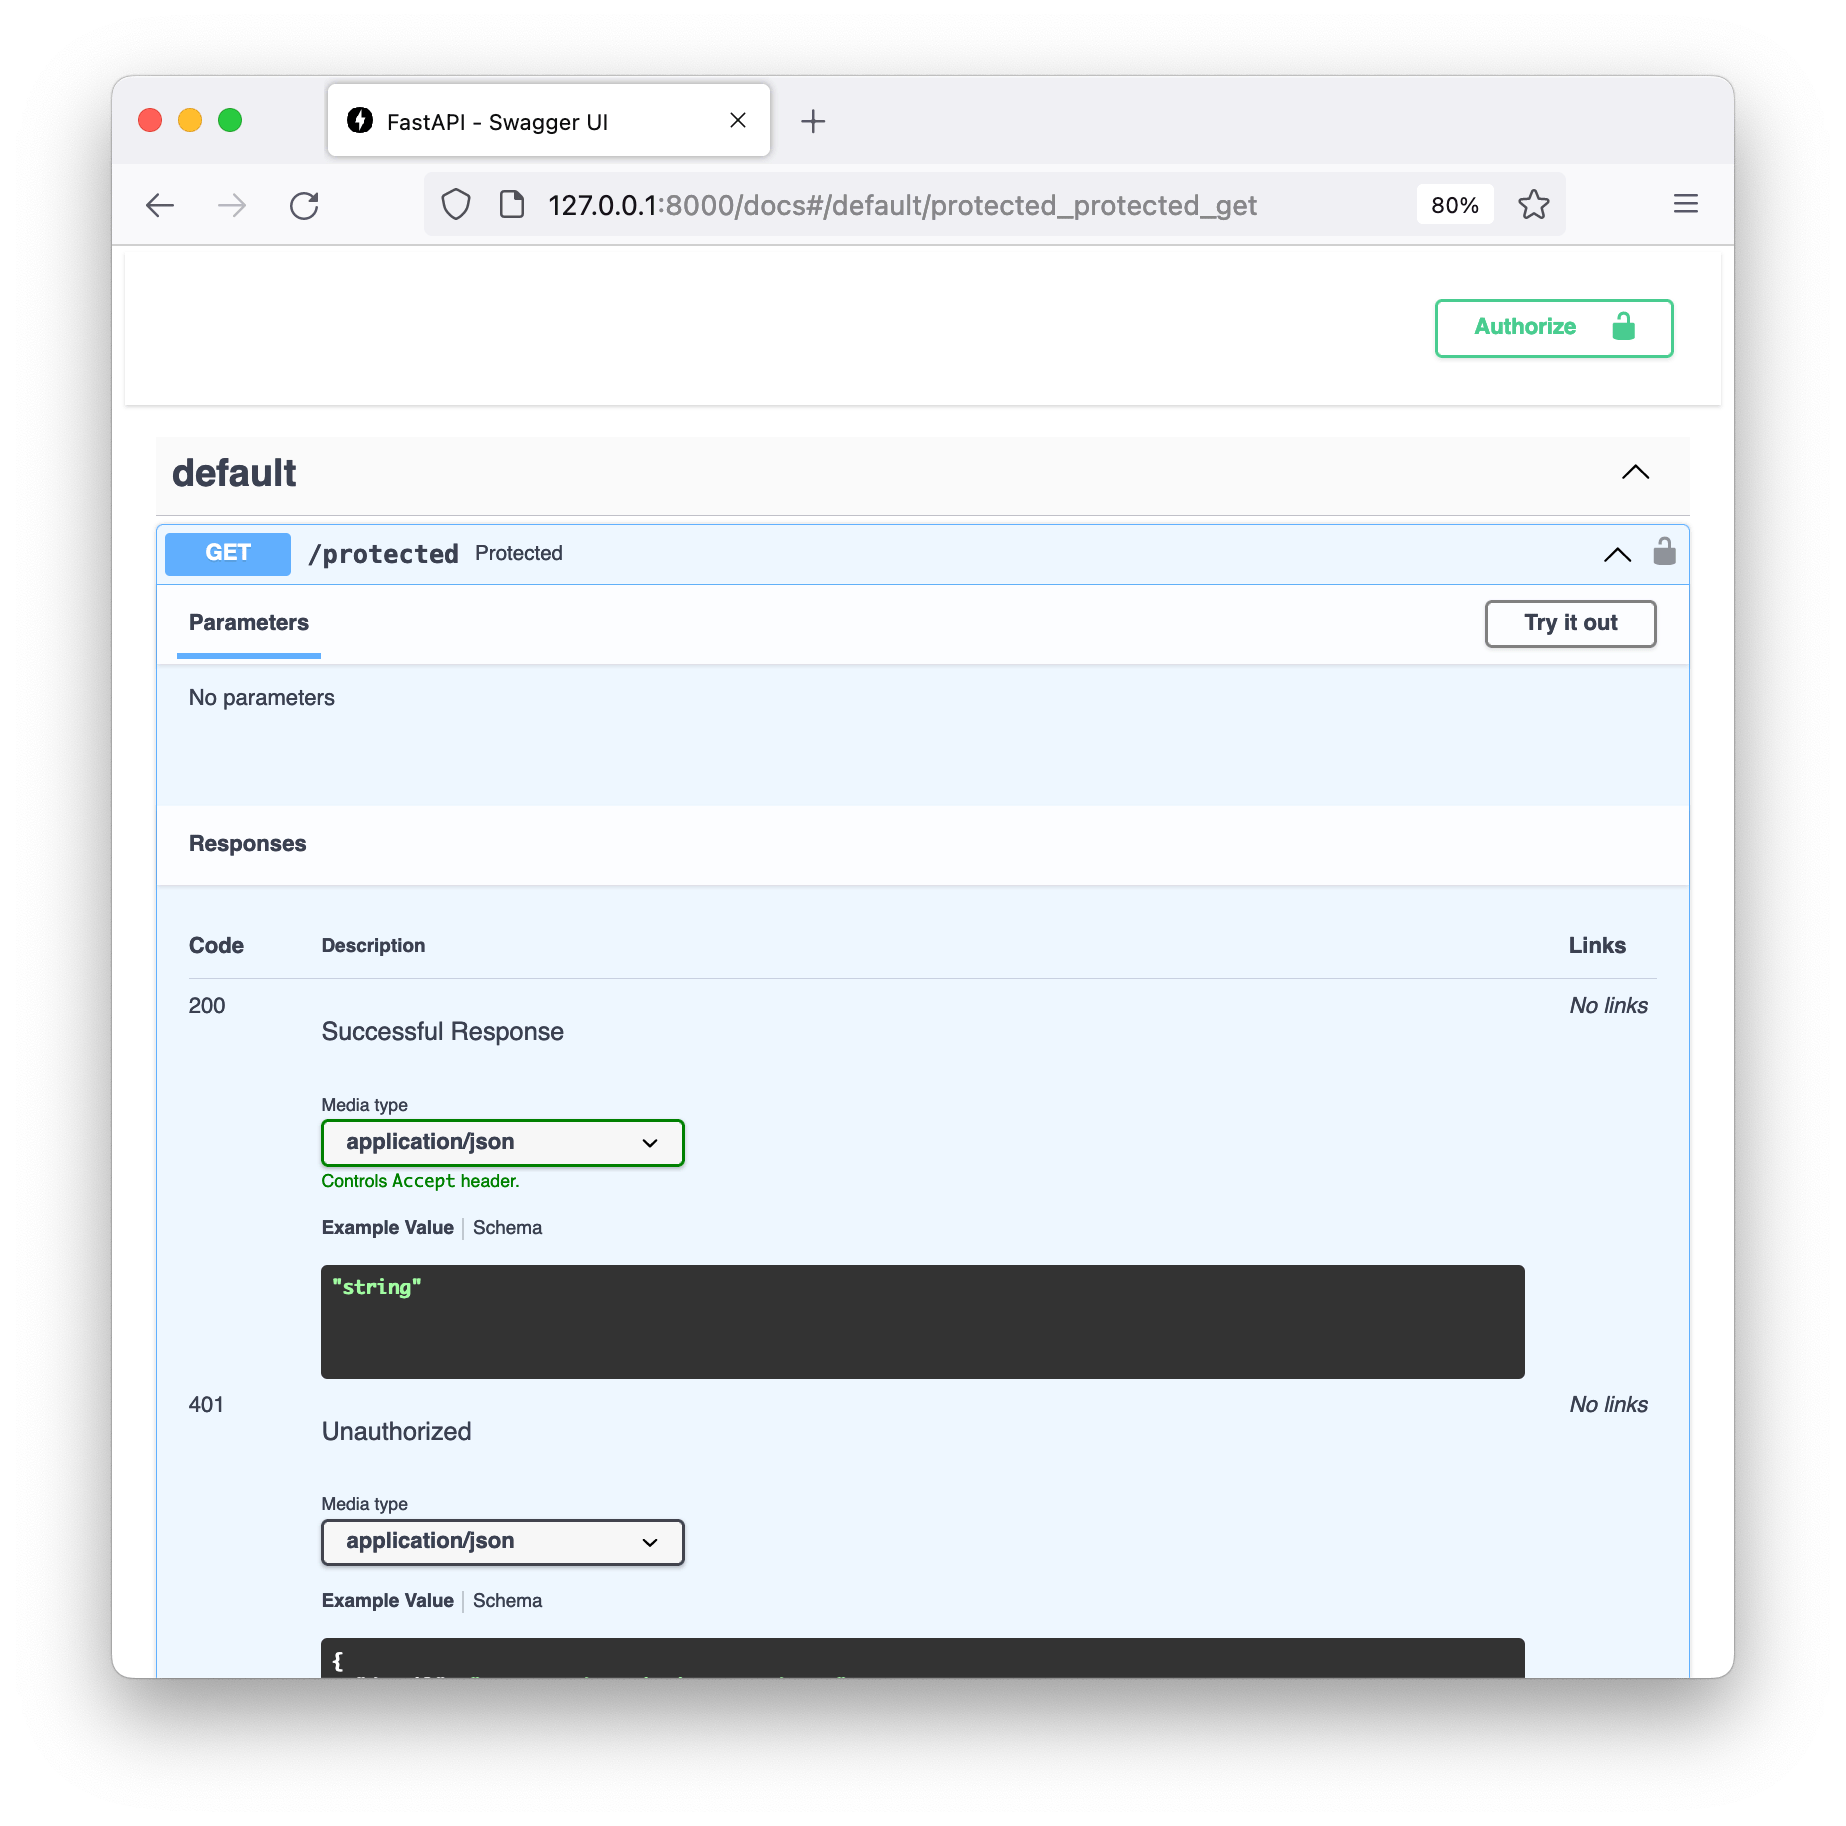
We can click on the “Authorize” button in the top right and enter a token value.
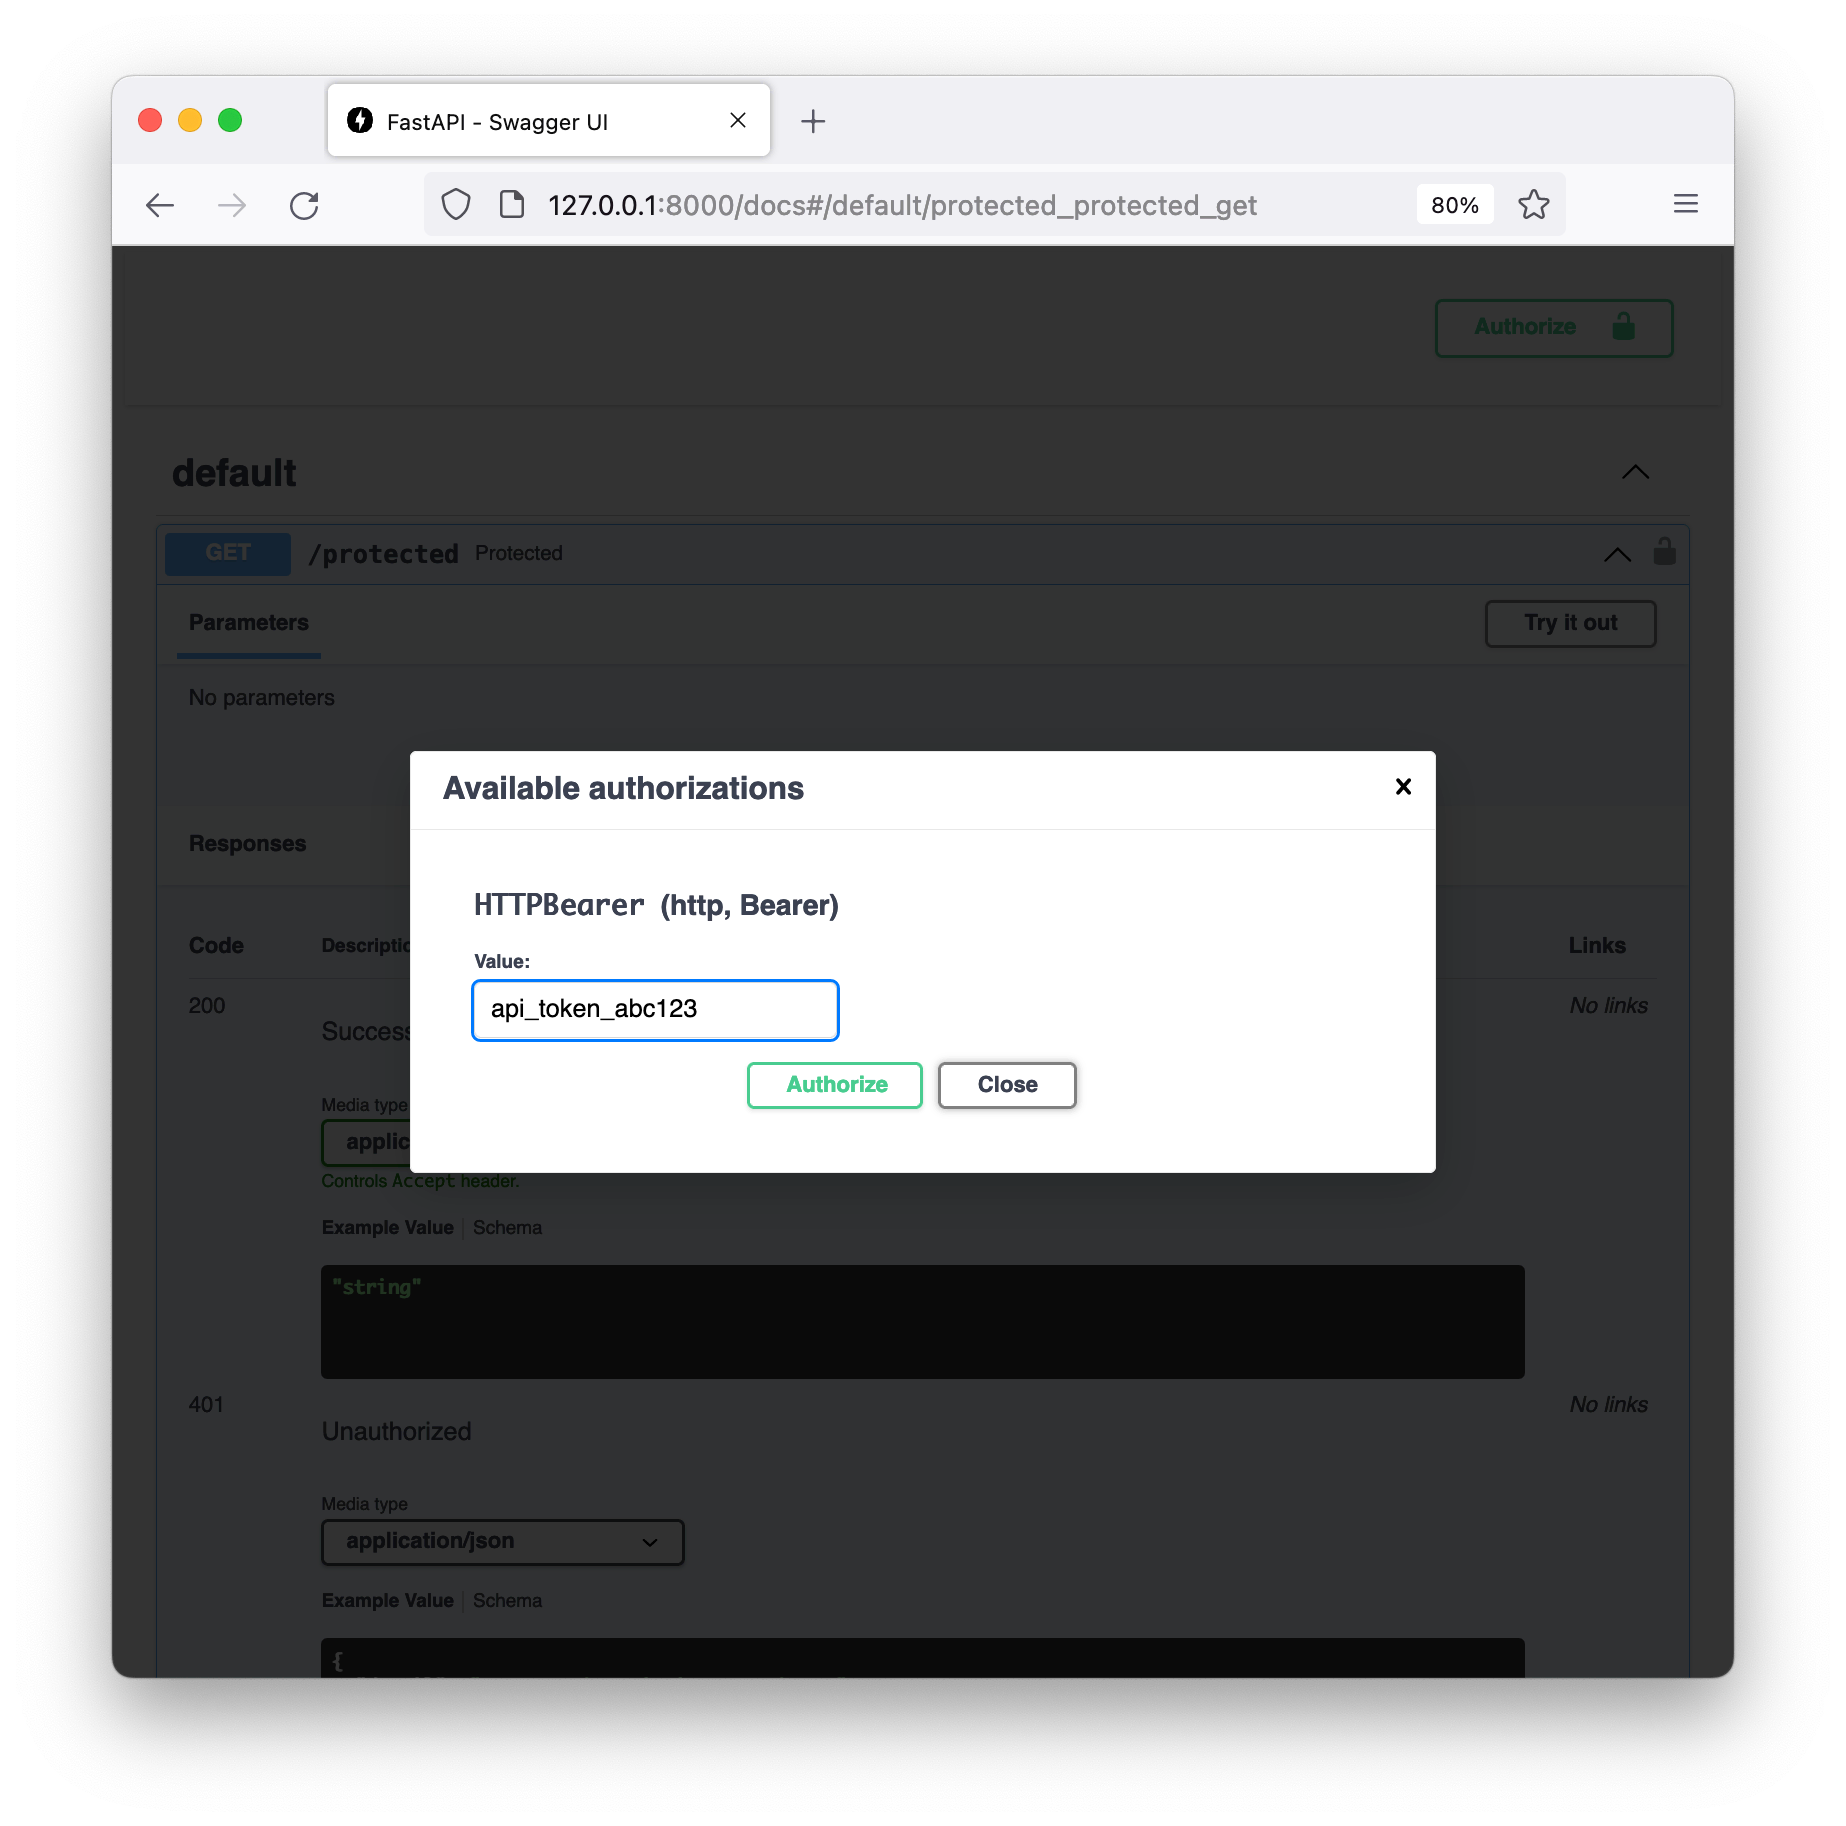
Finally we can see the request was successfully authentication, meaning our
application received the token value, all without having to parse the
Authorization header manually!
The full source code for the final application is available as a gist.
